Starting and Completing a Review
Objectives
- How to Start a Review
- Selecting Region, Location and Review Tool
- Completing a Review
- Marking Responses
- Adding Notes
- Adding /images/images or Documents
- Flagging Action Items
- Submitting a Review
- Notifications
- Follow-up Date
- Next Steps
Starting a Review
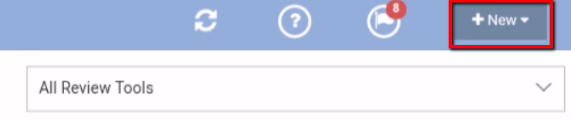
- Click +New in the upper right-hand corner. Select New Review.
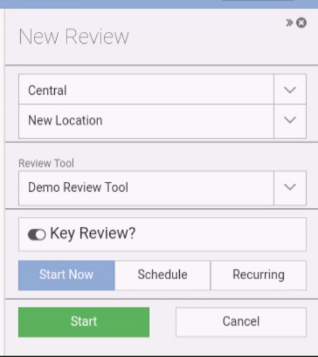
- Select your Region, Location, and Review Tool.
Please be sure to leave the Key Review switch on, so that this review is shared with the appropriate users.
Make sure Start Now is selected.
Click Start to begin the review.
Let’s examine the review page.
NOTE: Performing a review on a smaller device, such as a phone, may look different. Because of the smaller screen, only one of the columns will show at a given time. However, the process of filling out the form is the same.
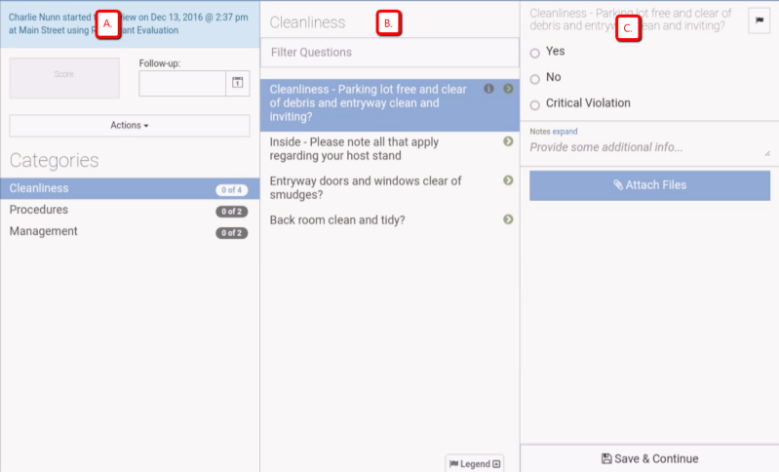
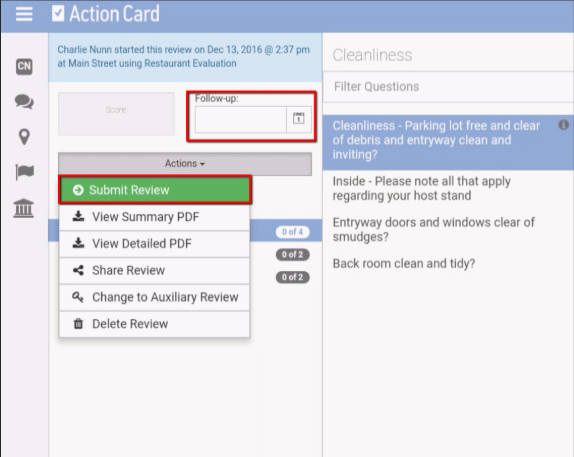
All categories are located here. A user can jump around categories, and complete questions ‘out of order’. The Actions menu holds a few options, including:
- Submit Review
- Detailed PDF
- Ability to delete review (if permissions allow)
- Ability to share review
- Other administrative options
All questions from the selected category are shown here. Users can filter by question. If there is any helper text, it will be present and accessible by clicking i.
There is also a Legend on the bottom, to indicate what any symbols mean.
After selecting a question, the available responses, details, notes section, and ability to upload documents or /images/images will be shown here.
Filling out the Review
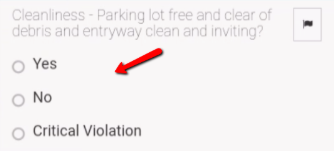
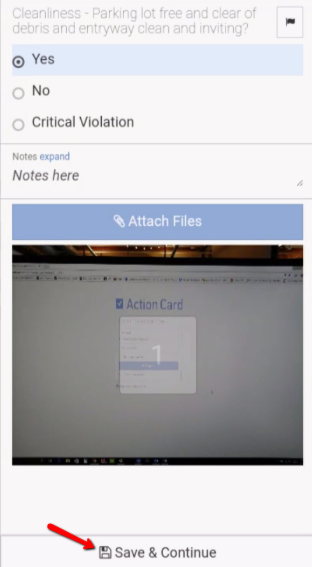
Begin by selecting a category and question. Question details will appear.
Select a response.
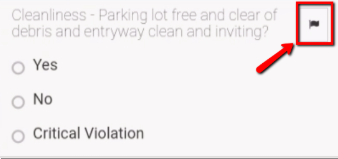
- Decide if this question should be marked as an Action Item.
Action Items are items that require some sort of follow up and reconciliation.
Click the flag icon to mark a question as an Action Item.
NOTE: Responses can be set to automatically generate Action Items.
- Next, provide any notes (if applicable).

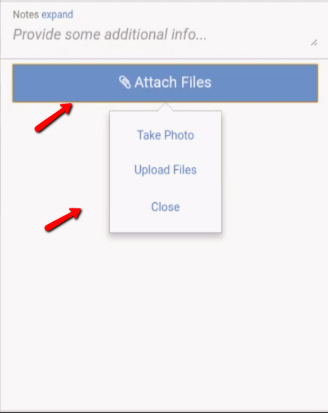
- Attach any /images/images or documents. Working on a mobile device, you will be prompted to take a ‘live’ photo or attach one from the /images/image gallery. When on a desktop computer or laptop, clicking ‘attach files’ will prompt your file explorer.
After completing a question, click Save & Continue to save your work and move on to the next question.
If you wish to jump to another question, please navigate back to the category or question selection page.NOTE: Your work will not be saved if you do not click Save & Continue.
Submitting the Review
Once all questions have been answered, set a follow-up date (optional) and click Submit Review. The submit button is located under Actions.
After a review has been submitted, an email and/or push notification will be triggered off to users attributed with the location being evaluated.
The email contains a Detailed PDF, and a link to login and view the review.